SIMS - Configuring the IRIS School Data Extractor
- Chris Hayes
Configuring to SIMS or SIMS Connected
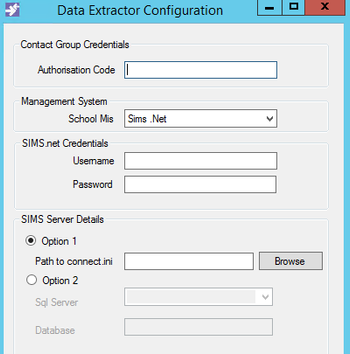
1. Enter the authorisation code you used to download the software. The authorisation code you are given is unique and must only be used for your school.
2. Select Sims.Net as the schools management system
3. Enter a Sims account with the permissions of 'Administration Assistant', 'TP SuperUser', 'Third Party Reporter', 'Exams Officer' and 'Admissions Officer'.. We recommend creating a dedicated account.
4. Enter the path to your school’s Sims database by clicking Browse. This will normally be a folder called S:\SIMS. In a shared environment, the folder will contain a ‘connect.ini’ pointing at your school’s data.
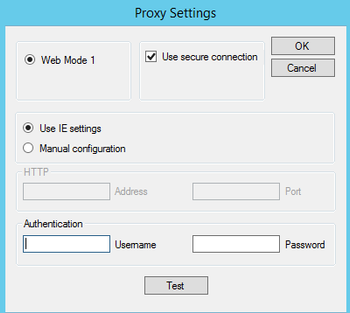
5. If the school uses a proxy or web filtering software, click on 'Settings', select Manual Configuration and enter the details as required. Once done, click 'Test'. This must come back as 'Connection OK'.
6. Once you have filled in all of the details, click OK. This will display two messages which should confirm the setup has been completed successfully.
If you receive any errors whilst configuring the software please check our Common Errors guide
Related articles